Showing posts with label Shell Edging. Show all posts

Wednesday, December 4, 2013

Eva Shawl-Shrug

Finished off with the Eva Shawl pattern I was working on. Made it into a cute shrug for my lil angel.

I could not get a better pic, thanks to her being wiggly and active always! I tried to get a decent picture and finally had to be content with the ones I got.


Pattern: Eva Shawl Pattern
Yarn: Nako Comfort Stretch
Hook: 5.5 mm
Edging: Shell Stitch

I made the pattern to a size that would fit my daughter. And then folded the ends down and sewed it together to create arm holes. Weaved in the tails and that's it. A cute shrug for my lil one.

Tuesday, December 3, 2013

Experimental

I have been browsing the web for a lacy crochet pattern for a project on my mind. I really never thought anything that suitable until I chanced upon the Eva Shawl pattern. I didn't have to waste any moment thinking. I just knew that was what I was searching for.

Started it off and it is on my hook now.


It has reached the required dimensions. Just some finishing stitches and weaving in the threads remaining. 

Finished item in my next post! Bye.

Tuesday, November 26, 2013

Sunhat

I tried yet another new project - a Sunhat for my cutie pie.

I saw some stitched versions of it on Pinterest and thought I should have one for my lil one (though she pulls it off). I did find some patterns, but did not find anything with the dimensions I wanted. So I figured out the math and finally made one.

Here it is.

I wanted to take few pics with my lil model wearing it. But unfortunately, she can't stay still for pics. I'll have t take some time out to do a proper photoshoot.

Now, coming to the yarn - it is Nako Comfort Stretch. Thanks to Ninu without whom I wouldn't have found it. It can be ordered from the Pony Craft Store. The yarn is really soft and as the name suggests, it really does stretch. And exactly is the reason I chose it for this project. 

Now the rosette. I enjoyed making the rosette a lot. It was super quick and addictive. Especially, when it comes to Shell stitches, I just love it. 

I am now have a Crocheter's block.... Thinking, thinking, thinking, what to make next!

Friday, November 22, 2013

Angel Wings

Since I started crochet, I have always wanted to make a dress or something of that sort. Making one for me means too much of yarn and time. And I may not wear it too. Luckily I have my cute lil angel now for that.

I came across this pattern and instantly wanted one for my angel. I crocheted for a few days and here is the result.


I was uncertain about the end result. Many a times, I thought I should stop it half way and roll back all those yarn. But still the urge to create one kept me going. 

Unlike the pattern, it is not a pinafore. It is a dress with two buttons at the back.

I modified the pattern heavily. Increased the number of stitches, rows, changed the style from pinafore to dress, and made it look like a bubble dress with a shell edging.


Here's a sneak peak into the inside of the dress. 


Excuse the poor quality pics. I did not have much time as somebody lil was tagging and pulling at my legs to be lifted up. Only while I was transferring the images did I realize that I had put it in the wrong setting. And no time for pics again now. 

One more pic of this dress... I am so much in love with it. 

Thursday, March 29, 2012

Again something Floral

I am having busy weeks now, owing to work and household chores. In between I managed to sneak in a few stitches here and there. And the results are …..

Yes, floral coasters.

And no, I didn’t stop at making two.


I made whole two sets of four each. So eight all together.

I don’t have a written pattern. Just worked it out. Will share the pattern if I ever write or draw it J

Thursday, March 15, 2012

Red and Blue

Recently I did some yarn shopping. I was not too happy with the colors though. I did not get many colors I had in mind. Still I did buy a bag full of yarn ;-)

Yesterday I took out the red and navy blue out of the lot and started making circles.

Ended them off with a shell edging.


Made a loop to it.

And here is what one looks like.


The other one is like this.


Place a small bowl on it and it looks cute.


The more you add, the cuter they look.


And yes, use them everyday (you can see it on the mug in the picture) :-)

Actually the writing on the mug reads as "Wish it was Sunday everyday." I always hope it was true! The mug was a gift from my Secret Angel in office an year back.

Making these coaster were addictive and super easy. What I particularly enjoyed was the Shell Edging. Add there was very little weaving in the loose ends involved or to be more precise I just had 2 loose ends to weave in. I used the weaving-in technique I blogged about earlier while I stitched. It did save me a couple of minutes and unnecessary yarn snipping.

Tuesday, January 10, 2012

Something Floral

Ever since I started browsing through the creative blogs online, I have been fascinated by the pin cushions. I love the creativity and amount of detail people put into it. I started realizing the need of a pin cushion when I started blocking out my crochet stuff. Then finally when I started stitching, I found it very difficult to proceed without one. And that is how my first ever pin cushion was created.

Remember these flowers?


These are from my flower hanging project. After the project, two of these flowers were left over. And like the other flowers for the project I had stuffed it up with cotton and had the puffy look.


And then it occurred to me - why not use it as a pin cushion. And from that moment onwards, it is full of pins :-)


What I love the most of this crochet pin cushion is that how much ever pin pricks it makes, it doesn't leave any marks on it. The cloth pin cushions get a worn out look after using it for some time.


Thursday, October 27, 2011

While I was away for a month...

Whoa! It's real long since I blogged anything here. But I have been doing things all along. I didn't click any pics and kept postponing it. That is the sole reason why I have not been blogging anything till now. Even now I haven't clicked any pics. Thought I'll just update you guys on what all I have done till now.


I made a big crochet granny square. The colours are maroon and green. It looks like an accessory for Christmas. Well, I made it atleast a month back and it now is in place for where it was created - on my fridge. I'll click a pic and post it soooooon!


Next were my experiments with my lovely sewing machine. So pathetic of me that I have not clicked a pic of my sewing machine yet. Anyways, the first few days I used it to learn and refresh my sewing lessons. Straight lines, curves, zig zags, and on it went for a few days. Then I sewed up a hand clutch. Yes, I did it! Though not a perfect one, I just loved it.


Then I sewed and sewed and tried to learn stitching necks for dresses. It took me a while to learn it. And once I learnt it, I jumped on to a kurta project, for me. I cut an old big dupatta and within a few hours, my first kurta was ready :-) It is not fit to be worn out because it is a bit crumply at places owing to the nature of the cloth material. But yes, I am wearing it at home :-)


Later I had the courage to create a kurta from a lovely FabIndia cotton dupatta I had for some time now. It did not take me long to finish it and the end result was really pretty. And I wore it out as well. Few said it was nice, though nobody knew I had stitched it ;-) I was thrilled with the result.


After the success of the FabIndia dupatta-kurta, I have now another on In Progress. It is a lovely orange shaded fabric. Only the neck needs to be completed and a little bit of shaping up. Then the kurta will be done!


On the crochet space, I did have some green, yellow, and off-white yarn left from this project. I started making granny squares out of it to make a small throw for the winter coming up. But I am out of yarn now. So I have gone back to my old Big Pink Blanket again. I completed 3 more rows of shell stitched on it yesterday. It is almost over 2 years since I started on the project. I don't know how many more months or years I'll take to finish it. Being a long item, it is a bit difficult to sit on the chair and sew. Let's see how it goes.

Thursday, September 1, 2011

Decorative Flower Hanging

It is a long time since I updated anything on my craft progress. Today I am sharing a crochet project I completed some time back (almost two months back). I was too lazy to upload the pictures.


Well, the project is a decorative flower hanging. This has been going on in my mind since a long time. Remember the flowers I was making some time back? Okay, when the number of flowers grew, I thought of using those for this project.


The project started with making the required number of flowers.


Then I sewed the edges together of two flowers with plastic twine leaving a little opening.


Stuffed in a little bit of cotton to give it dimensions.


Then sewed the remaining of the edges.


Then using June's icord tutorial, I created icords to join the flowers. Well, I must say that I loved the icord tutorial and its use. I found this tutorial right in time when I was thinking of ways to connect the flowers. The icord is sturdy, can be made as thick as you want, and holds the flowers in place without letting it twist and turn all the time. Go and check out her neat video of the tutorial.


After the icords were made, I joined the flowers and finally the flower hanging was completed.


The flowers, because of the weight, are not in the actual shape now. But still the colours are pretty. The best part is that it is hung right above our bed and I enjoy watching the colours every time I lie down.


To the end of the hanging I attached a small bell also. Simply. Me and hubby, there is not a day, when we are not ringing this bell. It is simply nice. :-)


Hope you enjoyed the project. I know that the pictures are not that great. But again, I AM LAZY :-)


Let me go and finish my biscuits.


Sunday, May 15, 2011

New Tote

I finally completed something which was on my list for a very looooong while. I had started this project way back in July last year. I had blogged about it here. It is a tote and was almost done, but not complete until two days back.


For the body of the tote I used thick maroon yarn. I did the modified shell stitch (as in my Big Pink Blanket). This stitch gives the bag a chunky look.


For the mouth of the tote, I used thin black yarn and single crochet stitches to make it firm and strong.


For the handle of the tote, I used it from an old handbag and did spaced single crochet stitches way around the belt.


I took the tote out with me over the weekend and am extremely pleased with the result. I may add a zipper or button to the tote mouth some time later.

Thursday, May 5, 2011

Bits and Pieces Project

After clearing off all those bits and pieces of papers and twines from my butterfly mobile project, I have come back to my very own Crochet. This time I have started on something with all the left over yarn I have from the previous projects. I was way too confused what to make out of these small balls of yarn. They would not be enough to complete a project. So I thought and thought and thought and finally it dawned on me.


Yes, I have been crocheting flowers. Remember my
flower project? That was made into a small neck scarf.


So now what do I plan to make of these? I am still thinking. I have a couple of small ideas. Let me see what works out. Meantime, if you have any ideas, let me know :-)

Wednesday, April 28, 2010

Blanket Progress

I don't remember when I actually started working on the blanket. What as a shawl is now becoming a blanket. So this means that lot of time and yarn more than what was actually expected should go in. Just take a look at the growth of this blanket.


It can now be spread on a double cot bed. Please ignore my messy bed. Shall I call it my craft station rather than describing it as messy? ;-)


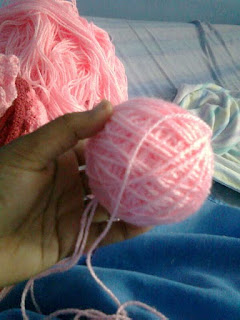
I have used four different shades of pink yarn now.
The stitch used is a modified version of Shell stitch. In the same stitch space, I stitched three trebles, then two chains and again three trebles. This will give a pointed appearance instead of the rounded top.


I love seeing this BPB and what I love the most is snuggling against it.


So I am off to start with the next row of baby pink.

Hope you all enjoy your evening!

Wednesday, February 17, 2010

Tired fingers!!!

My fingers have been idle for a while. Know the reason? I have got married and was away from my normal life for a month. Now I am back to normal with a new person with me. I am glad that he does encourage me when I crochet or throw bits of cloth and wool here and there while being crafty. I am thankful for being given such a wonderful partner.


Coming back to my crafty world, I have lots of ideas and projects to be done for our new place of stay. I have actually started with a small project but unfortunately don't have the pictures. But here I share with you the biggest project (incomplete) till date.

I intended making a shawl for my mom. Like most women even she loves pink and I bought many skeins of this pink shiny wool.


I employed my fingers to work fast and give perfect stitches to keep my mom cozy during the winter. Only after crocheting a few rows did I realize that the length is very much more than that required for a shawl. But I was reluctant to undo the stitches. I kept doing on and on. And finally I made up my mind that this will become a comforter or bedspread for us. So I am still working at it. And as you see from the pictures the stitches are close. Similar to shell stitches with a triangled look, it is fluffy and heavy. Sometimes I wrap it and enjoy the warmth and delight of being in it. I am looking forward to completing it and spreading it out on our lovely bed!