Showing posts with label Crochet Techniques. Show all posts

Wednesday, December 4, 2013

Eva Shawl-Shrug

Finished off with the Eva Shawl pattern I was working on. Made it into a cute shrug for my lil angel.

I could not get a better pic, thanks to her being wiggly and active always! I tried to get a decent picture and finally had to be content with the ones I got.


Pattern: Eva Shawl Pattern
Yarn: Nako Comfort Stretch
Hook: 5.5 mm
Edging: Shell Stitch

I made the pattern to a size that would fit my daughter. And then folded the ends down and sewed it together to create arm holes. Weaved in the tails and that's it. A cute shrug for my lil one.

Monday, March 12, 2012

Grassy-Lush Tablemat

Recently I came across this. Ever since I wanted to make something similar. Though there are instructions on how to make it, I headed over to the PlanetJune blog where I had seen this tutorial earlier. I had some green yarn left over from my Mini Green Blanket. When I started off I was not sure of the project. After some retries, I nailed it! And then there was no turning back!
It was super-easy and didn't take much time. I was able to complete it within a few hours. After all the loops were done, I cut through the loops and I loved every moment of it.


I love the lushness and softness.

The back is just some normal dc rows. I made this one variation from June's tutorial - June used SC stitches to turn over, I used DC stitches.

So I will be making more of these and in bigger sizes.

Wednesday, February 22, 2012

Weaving in Ends - Tip

Weaving in the ends are perhaps what I don't like. And when the project is big and with different colors of yarns, even worse. I found out a tip using which the number of ends to be weaved in can be reduced.


Let's see how to do it.

This is how you start with the stitch for a Granny Square or a crochet round.


The steps to make the end weaved in starts once the magic circle is done and you start doing the stitches in the square.


Yarn over, bring the hook through the magic circle, and when you do the yarn over again, make sure that the End to be weaved in (ETBWI) is in between the yarn and the hook. Now yarn over.


Continue the stitches while keeping the ETBWI in between during the yarning over step.


Here you see the length of the ETBWI visible reducing as the stitches increase.


And finally, there is no ETBWI now. You have only the loose end remaining. Result, lot of time saved on weaving in the loose ends.

Thursday, February 16, 2012

Granny Square Edges - Tip

The biggest challenge when making Granny squares are that they often do not turn out to be the perfect squares with the crisp edges. This creates difficulty when trying to join two squares together.


So some tips -

When making a Granny Square:

1. Choose the correct size hook for the yarn you choose.

2. Hold the loose end of the yarn with even tension throughout the process. If you keep varying the tension, the size of the stitches also vary, which creates uneven squares.

3. When using more than one type of (or colour) yarn to make a square, make sure that the yarns are of the same ply and thickness. Else, the square can become uneven.

When joining Granny Squares, if the edges of are curved up like this, it is difficult to get the stitches correctly.


Here is one tip. Hold the squares to be joined together. Insert a smooth thin rod through the holes in the edge and hold it taut till you get a neat corner on the square. I used my crochet hook itself to hold the stitches up.


Now you can see that perfect bend at the corner as well as identify the stitches easily.

Happy joining :-)

Thursday, September 1, 2011

Decorative Flower Hanging

It is a long time since I updated anything on my craft progress. Today I am sharing a crochet project I completed some time back (almost two months back). I was too lazy to upload the pictures.


Well, the project is a decorative flower hanging. This has been going on in my mind since a long time. Remember the flowers I was making some time back? Okay, when the number of flowers grew, I thought of using those for this project.


The project started with making the required number of flowers.


Then I sewed the edges together of two flowers with plastic twine leaving a little opening.


Stuffed in a little bit of cotton to give it dimensions.


Then sewed the remaining of the edges.


Then using June's icord tutorial, I created icords to join the flowers. Well, I must say that I loved the icord tutorial and its use. I found this tutorial right in time when I was thinking of ways to connect the flowers. The icord is sturdy, can be made as thick as you want, and holds the flowers in place without letting it twist and turn all the time. Go and check out her neat video of the tutorial.


After the icords were made, I joined the flowers and finally the flower hanging was completed.


The flowers, because of the weight, are not in the actual shape now. But still the colours are pretty. The best part is that it is hung right above our bed and I enjoy watching the colours every time I lie down.


To the end of the hanging I attached a small bell also. Simply. Me and hubby, there is not a day, when we are not ringing this bell. It is simply nice. :-)


Hope you enjoyed the project. I know that the pictures are not that great. But again, I AM LAZY :-)


Let me go and finish my biscuits.


Monday, June 20, 2011

Another Flower project

I completed another floral crochet project over the weekend. But haven't clicked any pictures yet. Remember the flowers I were making few weeks back? Finally those have now got a shape and place for itself.

The completed item is kept in our bedroom. I made use of the icord tutorial by PlanetJune for this project. Will write more about the how I loved the icord when I finally show the pictures here. I have added an accessory to it and now I just love it. I am planning to turn the flowers from my flower scarf also into something similar.

Hopefully I will take the pictures today and post it tomorrow.

Sunday, May 15, 2011

New Tote

I finally completed something which was on my list for a very looooong while. I had started this project way back in July last year. I had blogged about it here. It is a tote and was almost done, but not complete until two days back.


For the body of the tote I used thick maroon yarn. I did the modified shell stitch (as in my Big Pink Blanket). This stitch gives the bag a chunky look.


For the mouth of the tote, I used thin black yarn and single crochet stitches to make it firm and strong.


For the handle of the tote, I used it from an old handbag and did spaced single crochet stitches way around the belt.


I took the tote out with me over the weekend and am extremely pleased with the result. I may add a zipper or button to the tote mouth some time later.

Friday, April 1, 2011

Rippling Away

My first attempt at a ripple project.


Does it look nice?


Its a baby wrap or shawl.


I loved the way it turned out.


Chose the colours and started on it right away.


I am really thrilled by the end result. Now, I have to weave in the loose yarn at the ends.

Wednesday, July 7, 2010

Basic Crochet - Chains

There are many veteran 'crocheters' out there in the blogland who provide easy and quickly graspable demos on how to crochet. I am also planning to list out on my blog on how to do the basics of crochet, what I know. This is just to help anybody out there trying to start with crochet and also for me to refer at times. Will you believe if I said that I forgot how to crochet a granny square? Yes, I actually did. Last week, I had to give it a few tries until I got it right. That is when this idea of jotting down the basics struck.

So today we see how to do the basic chain stitches.

Step1: Make a slip knot and slide your hook in.

If you are not sure of how to make a slip knot, see the steps here.

Slip knots are used not only in crochet, but also in knitting and in our daily lives for tying up things as well. Learn it :-)

Step2: Yarn over the hook, and pull it through the loop.


You get the first chain.


Step3: Keep repeating step 2 until you reach the required number of chains.


There, you have a lot of chains to build your crochet on.

Happy Hooking! :-)

Wednesday, April 28, 2010

Blanket Progress

I don't remember when I actually started working on the blanket. What as a shawl is now becoming a blanket. So this means that lot of time and yarn more than what was actually expected should go in. Just take a look at the growth of this blanket.


It can now be spread on a double cot bed. Please ignore my messy bed. Shall I call it my craft station rather than describing it as messy? ;-)


I have used four different shades of pink yarn now.
The stitch used is a modified version of Shell stitch. In the same stitch space, I stitched three trebles, then two chains and again three trebles. This will give a pointed appearance instead of the rounded top.


I love seeing this BPB and what I love the most is snuggling against it.


So I am off to start with the next row of baby pink.

Hope you all enjoy your evening!

Tuesday, April 27, 2010

Storing and Sorting - Anagrams!

I don't have a lot of crafty items. But I do have some yarn, needles, threads, scissors, fabric, and such stuff. Storing these is quite very difficult for me as I don't have a proper storage place. I have been admiring a lot of storage products at various online stores. Most of these were out of my budget and I was thinking of making one by self. I had bought the fabric as well and taken the measurements to make a hanging storage. But luckily, I must say, my friend gifted me with a multi trayed storage stand. Yippeee... I was actually jumping with joy when I saw that my crafty goodies were fitting nicely into the trays and looked organized for the first time EVER! And more to the happiness, she had also given me a small basket which can hold my essential craft items when I being a bit crafty. Want to see it?

Take a look at the inside also.

I am not very happy about the fabric in the basket. I do have thoughts of changing it. But I am letting it remain for some time. I love the small flowers on the fabric. It is real cute.

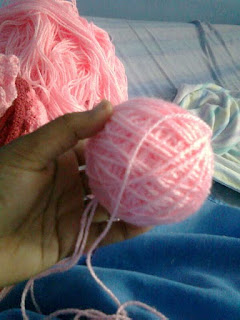
You think that I have only those much of yarn? No, I have a little more. But all are messy and tangled up. I am currently into this job of untying the knots and making them into lovely yarn balls. And my dad was kind enough to help me in the process.


A small update on my Mittu. It was cloudy today and Mittu was sitting at his regular spot enjoying the breeze and the view. That's when I reach home and start trying to irritate him. I start with taking a few of his pics. He does stay still for one or two.


And then when he gets irritated what does he do?


I am quite happy that I am doing a little bit of crocheting regularly nowadays. Currently I am doing one row each of my Big Pink Blanket (BPB).