Showing posts with label Craft. Show all posts

Wednesday, December 16, 2015

An easy Topiary

I love greenery within the house. I have always kept money plants indoors, wherever we lived.

After moving into our home, last year, I made few attempts to grow money plants indoors. It often wilted due to lack of sunlight and neglect. Finally I had given up on the idea.

When browsing through blogs, I saw the fake topiaries and had an instant liking to the idea. There were some good topiaries in the home decor stores and online. But I found them pricey for the size or quality.

On a recent shopping trip, I found few artificial leaf bunches. They were small leaves and had a color gradient - dark green at the bottom and lighter as it went up. And it wasn't pricey. I bought 3 bunches of it to make my own topiary.

Back home, I decided to use a plastic container I had in the kitchen to hold it. I bought some floral foam, fixed it into the container, and carved a sphere on the top. The leaves were pretty long. So I cut each strand into two - the darker and lighter ones.


In the picture, you can see the bigger and darker leaves to the bottom right. The tender and lighter leaves are to the upper left.

Working with the foam was very easy. I just had to push the stalks in. I started working from the bottom of the sphere. The darkest leaves on the bottom and as I worked upwards, I added the lighter ones. This gave it a natural color tone.


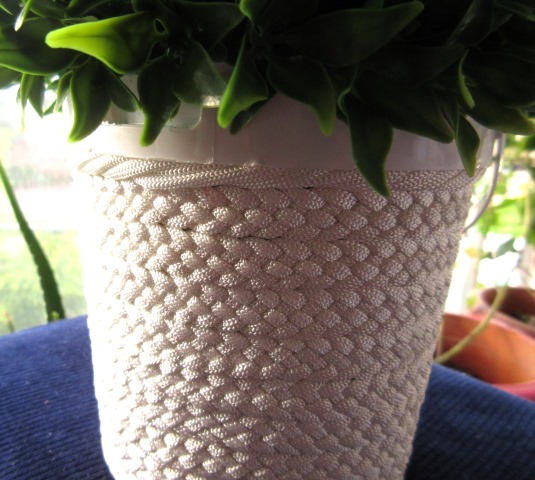
Once the greenery was set, I moved onto prepping the container. There were various options - spray paint, wrap with jute/yarn, cover with fabric, and so on. Finally, I decided to go with a macrame wrapping. I had some white macrame and made a very long 5-strand braid.


You can see three rounds of the braid in the picture.

The container had a glossy surface. I was not sure how to attach the macrame braid to the surface. After few rounds of thinking I figured out that I could use masking tape.

Stuck a layer of masking tape around the container and then I could attach the braids with regular craft glue. Unfortunately, I do not have any pictures of the process.

And it was done.


For the very top row before the braid, I twisted some macrame cords and fixed it.


Check out my lil assistant helping me out with the photo shoot :-)


Thursday, February 5, 2015

Decorating

Last week, it was our little Angel's second birthday. We decided to host a small get together at home. There were few infants on the guest list and we wanted all the toddlers, infants, and Moms to be comfortable. We had around 25 people and prepping the house for the event really kept me on my toes for quite few weeks. Finally, there was a chance to unpack any unopened boxes, organize entire wardrobe, give away or sell-off no more used items, and make our home tidier. Once everything was in place, we thought of few decorations to be done.

It was minimalistic but this is what we did:

- Settled on for shades of blue and lighter complementing tones.
- Created a big '2' from metallic blue-shaded balloons.
- Ribbon backdrop for the cake cutting.
- Tissue paper pom-poms hanging from the ceiling.
- Line of pom poms on a wall.
- Considerable amount of balloons all over the floor.

Now some snaps.


The pics are little blurred as I cropped them out from the whole to show just the decor. If possible I may upload a few more good pics.

Now look at this doily table spread. It is a lovely spread, handed over to me by my Mom. And this was the perfect occasion to use it.


Friday, November 14, 2014

Red, White, & Black

Wondering what the title is about?


Well, my daughter started going to the Day Care last week, and day before yesterday I was informed that they are conducting a Fancy Dress Competition for the kids to celebrate Children's Day that is today. I thought I will just dress her in some traditional skirt and blouse as I didn't have much time and my lil one does not co-operate well with dresses other than stretch pants and Tees.

But my crafty side and wanting to dress up my girl was not letting me sit idle. I was clear on two things - I will not buy any costumes nor will I spend too much time on the project, as I was not sure if she would wear it at all. I took a look at her dresses and finalized on a cute, red frock that she wore on her very first birthday. Then it was up till a little above her ankles. Now I knew it would be just till her knees or so. But it is a cute dress... will frills and tiny embellishments, satin and a tulle over it. Many thoughts crossed my mind - butterfly, angel, and even Red Riding Hood.

I had almost zeroed in on a Butterfly. But could not buy the supplies yesterday due to incessant rain. Then I thought I'll go with Red Riding Hood. I searched my stash and old clothes, but could not find a material to match the hood and I was very doubtful that she would wear it. Finally when I was putting her to bed, I browsed for ideas and saw some Minnie mouse costume. Yes! I finalized. As soon as she was asleep (11:45 PM) I told my hubby that it would be a Minnie. After finishing off a very very late dinner and other stuff I finally started to get the dress together.

Here is the pic for my idea and details.


The first thing was the black highlighted ears and the red bow.

- I wrapped black yarn over a headband and hot glued the yarn ends.

- I thought of cutting out felt ears but hubby suggested Pom Poms. He had seen me making some of those over the last few days. I opened my Pandora's box :-D (my yarn box). I was lucky enough to have some black yarn and quickly made two Pom Poms. I hot glued them to the headband and tied the strings also so that it doesn't come off.

- For the bow, I cut out a bow shape felt, gave it a little pinch in the center (vertically) and hand-stitched it onto the yarn layer on the band.

- Next, I cut out white small felt circles and stuck them to the bow.

And the headpiece was done.


The pics were taken on my phone, early in the morning and are not clear enough!

Now the polka dots for the dress. I thought of many things - paper circles, felt, fabric paint, etc. Felt won. But again fixing them to the dress was the next question. I knew hand stitching would be the best option, but I was out of time. It was already 2 AM. I quickly cut out some felt circles and stuck them onto the tulle layer with some clear tape. It was very clear to me that these would come off but I had no more energy and time to spent.


And how can you miss the yellow shoes Minnie wears. Felt was my option again. I just cut out a small half oval for the front of her pink shoes and stuck the pieces with clear tape.


I wanted to kick myself for not having bought her a pair of black stockings yet. The closest dark color stocking she has is a navy blue one and it didn't quite go with it. So I matched it up with a black stretch pant and red and black stripped socks. 

Done.


And how it went? Well, the little Minnie loved it and she is a little obsessed with her yellow crocs now. When one felt dot fell off from the dress, she starting picking the other dots and I had to keep fixing them back :-) The bow and ears looked too cute on her!

I skipped few things for the costume - gloves (no time), black full sleeved tee beneath the dress (it would be hot for her), and did not paint her nose black ;-)

My Minne mouse was all happy and I did click some pics while she kept wriggling out of the frame. Hopefully, I'll post those soon.

Thursday, October 30, 2014

Back with Pom Poms

It has been a very very long gap. I am not sure if I would contribute frequently going forward also - because Crafting is taking a very back seat in my life now. Even though I do some knick knacks now and then, who gets the time for photographs. And what is a craft post without some nice cute pics. 

This post also would not have any pics... but I am just letting you know... I am now making some pom poms. WHY? I have lots of yarn which I would not use for any other projects and making pom poms does not require me to keep track of stitches or be very keen. 

I am planning to make a small plush rug. Hopefully I will be done in a few days (weeks) time. I often see my pom poms rolling on the floor, being thrown up in the air, and being spread around by the lil one at home :-)

And btw, I used my Big Pink Blanket for the first time ever. It is huge and cozy. The three of us snuggled to the warmth under it and I kept clinging to it all night. And it looks lovely when laid out on the bed. Hopefully I can take a picture and post soon.

See you soon!

Thursday, February 13, 2014

Craft Stall

My first craft stall was put up over the weekend at an apartment for an event they were hosting. I had mixed feelings about putting up the stall. It was the first time ever I was going to put my items out in the display for the public to see. But it went well. I didn't make much sales though. Yet I got to learn a lot, met lots of new people, got my contact across to many, and so on.

The stall was up by the time I was at the venue and the sun was right on top. A friend was helping me out. We put out the items on display. We spent quite a lot of time hanging stuff, pinning, re-pinning, rearranging, viewing, discussing, and so on. Finally, everything was spread out and it actually looked pretty. I was a little nervous too.

Around evening people started dropping in. Some just passed by, some came and took a look, and few others looked at each item. People who were interested in colorful stuff and handicrafts spent time at my stall. They went through each item. Asked me the price, time involved to create, yarn type, and so on. And some who were knowledgeable about the craft enquired more.

Almost everybody made it a point to take my card (hubby was happy about that as he had designed it ;-)). We were at the stall till night. I wouldn't say it was a great event. But yes, I finally got a platform to display my stuff. And the best thing, I completed many unfinished stuff which had been lying around for a long long while. Especially the Big Pink Blanket. Looking forward to many more such events in the future.

Friday, November 22, 2013

Angel Wings

Since I started crochet, I have always wanted to make a dress or something of that sort. Making one for me means too much of yarn and time. And I may not wear it too. Luckily I have my cute lil angel now for that.

I came across this pattern and instantly wanted one for my angel. I crocheted for a few days and here is the result.


I was uncertain about the end result. Many a times, I thought I should stop it half way and roll back all those yarn. But still the urge to create one kept me going. 

Unlike the pattern, it is not a pinafore. It is a dress with two buttons at the back.

I modified the pattern heavily. Increased the number of stitches, rows, changed the style from pinafore to dress, and made it look like a bubble dress with a shell edging.


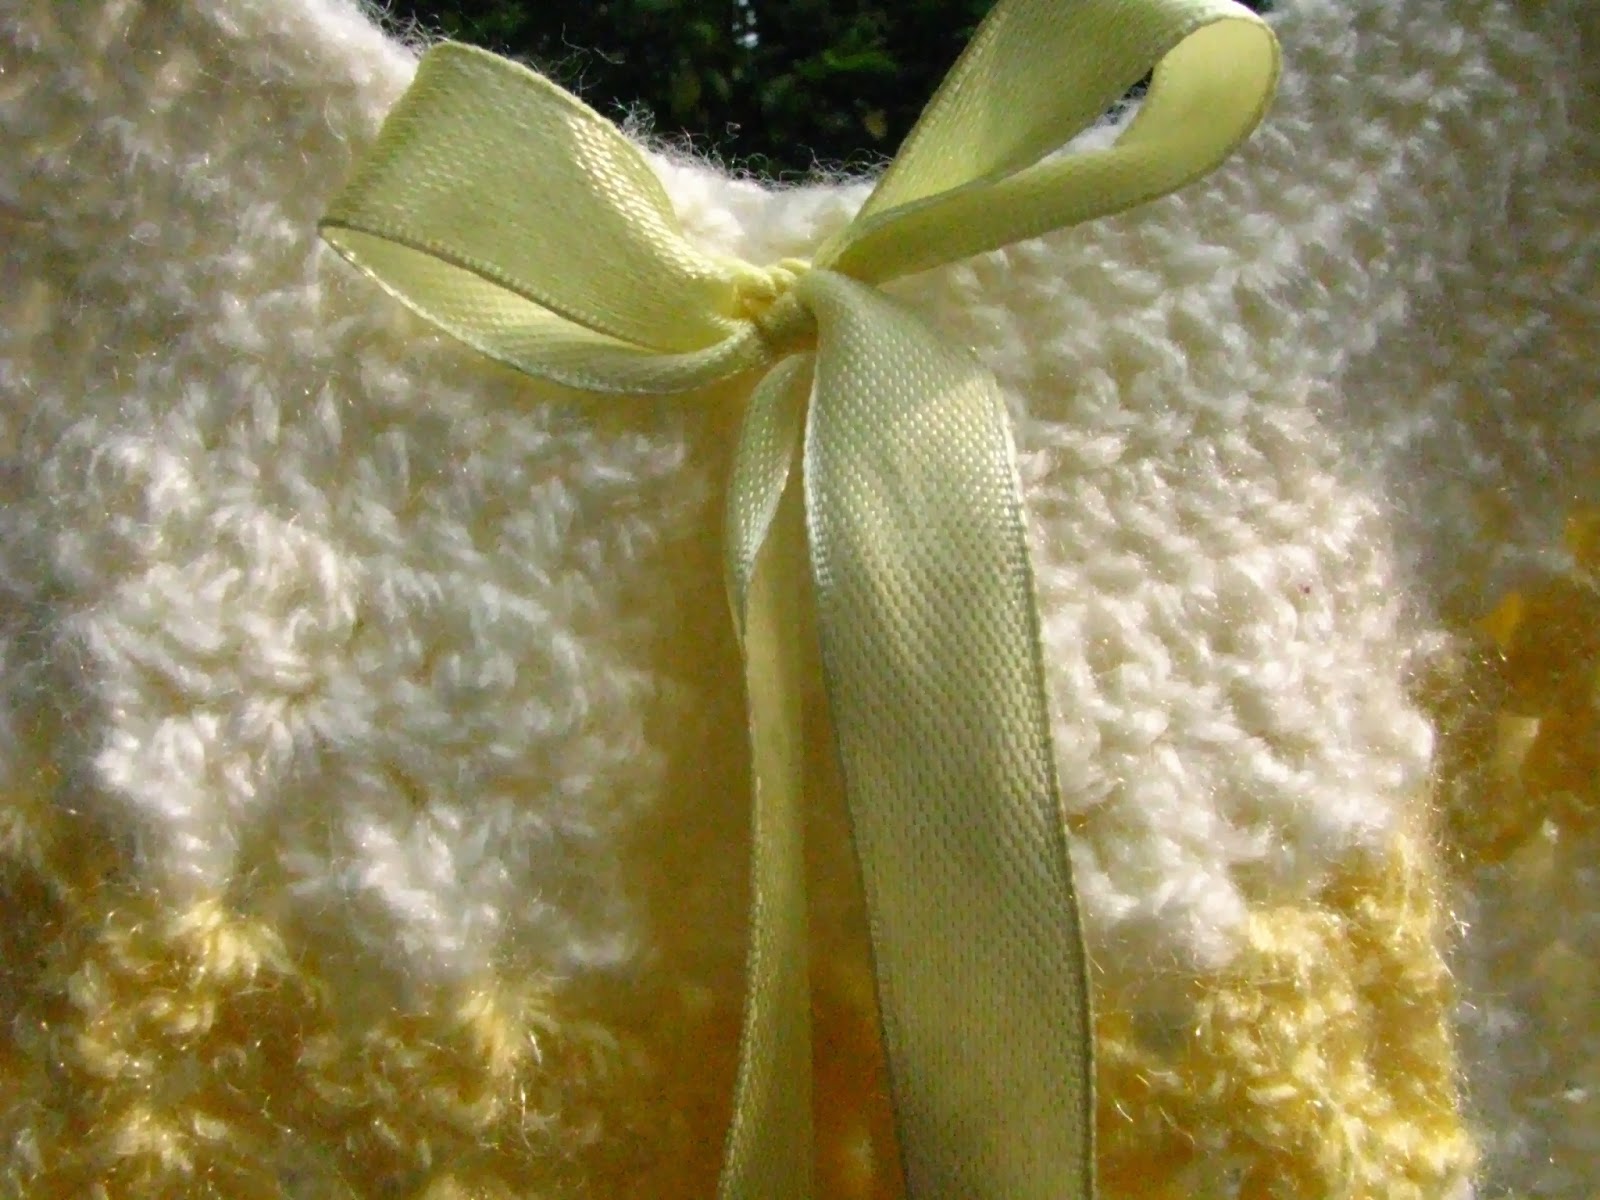
Here's a sneak peak into the inside of the dress. 


Excuse the poor quality pics. I did not have much time as somebody lil was tagging and pulling at my legs to be lifted up. Only while I was transferring the images did I realize that I had put it in the wrong setting. And no time for pics again now. 

One more pic of this dress... I am so much in love with it. 

Thursday, October 31, 2013

Baby Booties

After my baby's birth, I never really had time for any good craft. I had made few shawls before the delivery, which she snuggles in at night. All I could make for her after that were booties. I had never tried booties before. But when we started taking my baby out and she needed something for her soft feet, I started hunting patterns for booties. I came across the Posh Crochet Baby Booties video by CrochetHooksYou and have made 4 booties for her since then.

I doesn't take much and gives instant satisfaction. I don't have pictures of the earlier 3 and now her feet has outgrown those. I made some tweekings to the sole and the overall design and created a new pair for her bigger (cuter :-)) feet. Time for some pictures.


Nothing fancy. Just to keep her feet protected. She has now completed 9 months and is often out of the house in the yarn either crawling or on her walker. Could not get a decent picture of her wearing the booties. She does not like being stationary now :-)

I put on the buttons so that I can pull them tight when the stitches get stretched. Overall she is happy in the booties and so am I :-)

Yarn: Vardhaman Millenium
Skill: Easy
Hook: 4mm

Wednesday, November 14, 2012

Sold

I had registered a few of my items with ItsHandMade. Recently I got an order to make a set of coffee mug coasters. I was actually thrilled. Reason - It was going to be my first proper sale. I got the requirements and started on the projects. 

It was actually easy and thrilling. The lady to receive the coasters wanted it in green and yellow. I had both the shades. So I made eight of these coasters. It took me just an evening. Remember the floral coasters I made some time back. 


I stacked them neatly.


Put them in a gift pouch I had.


Put it in a cardboard box with a note for the lady.


 And wrapped it with transparent paper and yarns matching the coasters.


It reached out to her safe and in good shape. And I was really happy when she messaged me saying she received it and liked the coasters. Well, that's it for now! :-)

Wednesday, May 30, 2012

Unusable to Usable

Few weeks back I did a little bit of experimenting on jewellery making. Not 'making' to be exact, but I'll say 'modification'. I am not a too much accessories person. Though I love accessories, I am too lazy to change them often. So I stick to my usual regular ones often. But I have a few silver ones with me which I have not been using due to some practical difficulties. So I tried out making some changes to them to make them wearable for me.

First I took this anklet. This was a gift. I have never worn it for the past 2 years. And so I understood that I never would probably.


But I loved the black and silver beads on it. 


So I split it.


Made a small ring from a silver wire.


Added a small pendant which had been with me for almost 3 years now. 


And joined to make it a new necklace for me. 

The best part was that the length is accurate and I didn't have to make any changes to it.  


Next item, was another butterfly necklace. 


I love the butterflies on it.

But both the chain are in different lengths and are not too long either. So when wearing it, it keeps turning and twitching, which I was not comfortable with. And this had been in my box for the whole of last year. I decided to break it's curse.


Took out the butterflies from the chains.


Made the chains to equal lengths.


Added one butterfly to both the chains. And voila! A wearable new necklace for me.


I have kept the other butterfly apart. It may become useful sometime in future for some other project. :-)

Monday, May 28, 2012

Larksfoot Update

Its been a long time now since I finished my Larksfoot mini blanket. I had even photographed it right after finishing (at night itself, as I was impatient to wait till sunrise) and transferred the photos to my system. But had been keeping it here for so long. And every time I open my cupboard and see the finished blanket, I felt sad that I did not introduce the sweet one on my blog here. I finally made up my mind to blog about it. 


So here comes my Larksfoot mini blanket.


Hope you liked it as much as I did!

Thursday, May 3, 2012

In Progress

As always I have a few WIP projects now. You know, I can't stick to one project for long. I need to have a variety. So want to know what all I am working on now?

My larksfoot project is progressing pretty good. I am really liking the look though it is a bit dull.


Remember the set of yarns I showed you some time back? I have started a ripple out of it.


This is something entirely new. Inspired from a project which I will share later. For now, I have some knit scraps.


And a blue mesh sheet. 


 Will post updated pictures.