Showing posts with label Sewing. Show all posts

Thursday, December 18, 2014

The Brown Skirt

Last Friday, was color day at my daughter's day care. And the color decided was brown. Brown!! I was thinking - Really?? I thought there would be some brown dress stashed in her cupboard, which probably was not being worn and was long forgotten. On Thursday, I pulled out all the dresses, but could not find one that was brown. Hubby said let's buy one or let's just forget it was Brown Day. Even I felt forgetting was better. I tried to forget it the whole day, it just didn't leave my mind. But I didn't want to buy one either. 

Thinking thinking thinking, I thought I should make something. But my sewing skills are bad. I pulled out the few old brown clothes we had. I could not decide what to make - a brown top? shirt dress? or what. I knew attempting any of these would need enough time to complete, which I didn't have. And it may not end up neat. I was worrying more than required.

Soon I thought - I can make an easy peasy skirt! Yes, I finalized on it. That was the easiest I could make in this short time. I browsed for some really simple, yet cute patterns. Summary of most of the patterns were - cloth twice the waist size and some wide elastic. I had both handy and started off.

Cut out the bottom portion of a brown kurta of mine. I really loved this but had not worn it for the past few years. So the fabric was ready.

Measured out the elastic and kept it ready.

Took out my sewing machine and started stitching. 

It really didn't take me much time. It was cute but too plain. And it was sleep time. So I thought let it be plain. 

Friday morning, my heart again wished that I add some cuteness to it. Before getting ready for office, I quickly pulled out my ribbons, decided on a very soft pink wide satin one, and stitched it to the skirt.

Let me show you the pic.

It may not be a perfect one. But it was quick, easy, and cute. And my daughter was also excited!

Something to make me happy again.

Monday, March 12, 2012

More Paper Circles

After the Paper Mobile Project, I wanted more of it. So I gathered all the empty milk covers I had been collected over the past few weeks, traced out circles, and began cutting and cutting and cutting. Almost an hour later I had piles of cutout paper circles. I rushed to the sewing machine with the circles and started sewing them together. And then after half an hour I had a looooong string of paper circles.

So what do I do now. I measure, cut, paste, and hang!

Ta-daaah!


Yes, a paper circles curtain.

I was so thrilled throughout the project.

It is more than a week since I completed this project. But still my heart leaps with joy when the circle rotate in the wind.

Tuesday, February 28, 2012

Circles and circles

I have been doing some paper crafts lately. Reason - its easy and you get to see the end result quickly.

I wanted to replace my butterfly mobile with something new. I had some colorful brochures (from our home hunting last year) lying around. I picked those up and started cutting out circles in two sizes. For tracing the circle I chose a glass and a lid, in different sizes. I was so busy in the tracing and cutting that I forgot to take in-progress pictures.

Finally when all the circles were cut out, I laid the smaller ones on top of the bigger circles. Also tried to make them look as contrasting as possible. Once the pattern was set, I put my dear sewing machine to use - sewed all of them together.

And finally hung it on an empty wall near the kitchen.

What I love about this mobile is that when we switch on the fan in our living room, the circles start to twist and turn showing the colors.

I completed the project on Sunday evening and could not wait till the weekend to capture pictures of it at day time. So I clicked the pictures in the dim light itself.


I actually wanted to give the title to this post as 'New Paper Mobile' but then thought people might start thinking of it as a new mobile technology or gadget.

Monday, February 13, 2012

Mini Green Blanket

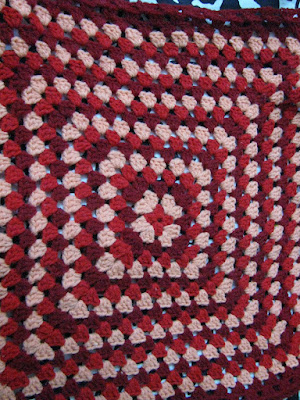
I finally finished working on the mini green blanket. I am extremely thrilled with how it turned out. I had very few threads to weave in and the granny squares turned out perfectly this time. They are the best grannies I have made till date. Joining together the squares were also a lot fun. I would pick up the granny squares, huddle in front of the television and start joining. This is fun as it doesn't require much attention and you get the feeling that you are almost nearing the end of your project.

The mini green blanket was a quick project as most of the grannies were already ready when I started on the project recently.

As I mentioned earlier, I went on for a the usual edging - simple double crochets. I made three rounds of the edges (the pic shows only 2) and didn't take the final pics though.

Well, let's see the final mini green blanket!


Thursday, October 27, 2011

While I was away for a month...

Whoa! It's real long since I blogged anything here. But I have been doing things all along. I didn't click any pics and kept postponing it. That is the sole reason why I have not been blogging anything till now. Even now I haven't clicked any pics. Thought I'll just update you guys on what all I have done till now.


I made a big crochet granny square. The colours are maroon and green. It looks like an accessory for Christmas. Well, I made it atleast a month back and it now is in place for where it was created - on my fridge. I'll click a pic and post it soooooon!


Next were my experiments with my lovely sewing machine. So pathetic of me that I have not clicked a pic of my sewing machine yet. Anyways, the first few days I used it to learn and refresh my sewing lessons. Straight lines, curves, zig zags, and on it went for a few days. Then I sewed up a hand clutch. Yes, I did it! Though not a perfect one, I just loved it.


Then I sewed and sewed and tried to learn stitching necks for dresses. It took me a while to learn it. And once I learnt it, I jumped on to a kurta project, for me. I cut an old big dupatta and within a few hours, my first kurta was ready :-) It is not fit to be worn out because it is a bit crumply at places owing to the nature of the cloth material. But yes, I am wearing it at home :-)


Later I had the courage to create a kurta from a lovely FabIndia cotton dupatta I had for some time now. It did not take me long to finish it and the end result was really pretty. And I wore it out as well. Few said it was nice, though nobody knew I had stitched it ;-) I was thrilled with the result.


After the success of the FabIndia dupatta-kurta, I have now another on In Progress. It is a lovely orange shaded fabric. Only the neck needs to be completed and a little bit of shaping up. Then the kurta will be done!


On the crochet space, I did have some green, yellow, and off-white yarn left from this project. I started making granny squares out of it to make a small throw for the winter coming up. But I am out of yarn now. So I have gone back to my old Big Pink Blanket again. I completed 3 more rows of shell stitched on it yesterday. It is almost over 2 years since I started on the project. I don't know how many more months or years I'll take to finish it. Being a long item, it is a bit difficult to sit on the chair and sew. Let's see how it goes.

Thursday, September 1, 2011

Decorative Flower Hanging

It is a long time since I updated anything on my craft progress. Today I am sharing a crochet project I completed some time back (almost two months back). I was too lazy to upload the pictures.


Well, the project is a decorative flower hanging. This has been going on in my mind since a long time. Remember the flowers I was making some time back? Okay, when the number of flowers grew, I thought of using those for this project.


The project started with making the required number of flowers.


Then I sewed the edges together of two flowers with plastic twine leaving a little opening.


Stuffed in a little bit of cotton to give it dimensions.


Then sewed the remaining of the edges.


Then using June's icord tutorial, I created icords to join the flowers. Well, I must say that I loved the icord tutorial and its use. I found this tutorial right in time when I was thinking of ways to connect the flowers. The icord is sturdy, can be made as thick as you want, and holds the flowers in place without letting it twist and turn all the time. Go and check out her neat video of the tutorial.


After the icords were made, I joined the flowers and finally the flower hanging was completed.


The flowers, because of the weight, are not in the actual shape now. But still the colours are pretty. The best part is that it is hung right above our bed and I enjoy watching the colours every time I lie down.


To the end of the hanging I attached a small bell also. Simply. Me and hubby, there is not a day, when we are not ringing this bell. It is simply nice. :-)


Hope you enjoyed the project. I know that the pictures are not that great. But again, I AM LAZY :-)


Let me go and finish my biscuits.


Friday, August 26, 2011

Something New!

Well, I am too excited and eager to share this with you - I have a new Singer Sewing Machine now. Yay! It is white with 10 stitches, zig-zag, and many other accessories as well. I have been waiting to own a sewing machine since years. I always wanted to buy one but the last moment I'll cancel the plan. My mom has a Janome 24 stitch zig-zag machine. I used to try my luck at that. And the urge to buy one for myself here in Bangalore intensified every day. And finally last week, we bought one.

I have kept it on a small table in my bedroom. I haven't taken any pics of it yet :-) I started getting acquainted with this sweet heart by sewing small hair scrunchies and bands. The results are pretty nice. I have even altered a few dresses as well. The altered which I love the most is a top I made from my brother's shirt :-) Now I have a lot of ideas running in my head. My crochet hooks and stuff are badly being avoided after the white lady has come in. But I guess I need to concentrate more on sewing now because I am really bad at it. Nowadays I keep practicing and practicing. But space is an issue now. We do have a spare room. But I don't prefer to go and sit there and stitch all alone. I am still thinking on how to create a small and interesting sewing corner. Suggestions are welcome :-) I have been browsing the web also. I am seeing some really beautiful ideas as well. Well, will keep you posted.

Sunday, May 15, 2011

New Tote

I finally completed something which was on my list for a very looooong while. I had started this project way back in July last year. I had blogged about it here. It is a tote and was almost done, but not complete until two days back.


For the body of the tote I used thick maroon yarn. I did the modified shell stitch (as in my Big Pink Blanket). This stitch gives the bag a chunky look.


For the mouth of the tote, I used thin black yarn and single crochet stitches to make it firm and strong.


For the handle of the tote, I used it from an old handbag and did spaced single crochet stitches way around the belt.


I took the tote out with me over the weekend and am extremely pleased with the result. I may add a zipper or button to the tote mouth some time later.

Friday, April 29, 2011

Butterflies all around

I have been away for a long while from Blogland. I was a bit busy (my usual excuse!). I had my family visiting, travelling down to Kerala, and some very tiring days. Finally I am back on track now. Meanwhile, in the few moments I could make fruitful, I made some things.


A butterfly mobile had been on mind since years. But I never actually made one until two weeks back. Take a look at it.


It may not be a very beautiful work of art, I agree. But I am very pleased with my effort. I used all scrap and coloured packaging papers I could find and made it. The effort to cut out each butterfly with the details was painful, but fruitful in the end :-) Then I wished, if I had a cricut cutter.


It didn't take me very long to finish this mobile. It was pretty quick and easy, apart from the cutting part :-D


Now it is hung up right in our living room and is beautiful when it turns and twists around!


Tuesday, May 18, 2010

Repurposing - Pair of gloves from old T-shirt

I have been thinking from a long time to buy a pair of gloves. Reason is that I drive my two wheeler to office and it is too hot in the mornings. I have started getting tans on my fingers. Though I am not a too fair person, it is easy to make out the tan now. Funny part is that I wear a jacket and so only the fingers look too dark. Earlier I did make an attempt at crocheting a pair of gloves. I worked on my own pattern and it did turn out fine. But the unfortunate part was that it got worn out too soon due to holding the brakes, accelerating, and more rough use. So for my use, cloth gloves was the best I understood. And luckily I got this idea - make use of the long sleeves of my t-shirt. I chose one of the t-shirts which I loved due to its stretchy comfortable fabric.


It was quite and easy project. Don't believe me? Let's see how to do it.


1. Pull out an old t-shirt.


2. Trace your palm outline onto the innerside of the sleeve.


3. Cut the sleeves in the required length and along the outline.


4. Now sew along the outline with inside out. I handstitched it and used blanket stitch for the edges and backstitch for the firm hold of the fabric together.

5. Now turn the glove out correctly and try it on. If you find that the wrist portion is loose fitting, you can sew a small elastic strip or create a button hole and sew a button on it. I used a press-button as that was what I had handy and was easy to finish off the project.

If you want you can embellish it with flowers, fancy buttons, ribbons, and laces. I left mine plain.

We have to do a lot of sunny business together now.

Tuesday, March 30, 2010

Busy Bee!

I was a busy bee over the last weekend. I actually completed some projects over the last two days. Like to see them?

Does it ring any bells? If you remember, in one of my earlier posts, I mentioned about making a small itty bitty purse for myself. Well, here it is.

I have put in a small pouch to hold my cellphone. And in the main space I can stuff in some money, my cards, hairbands, clips, my lipbalm, and a small notepad. I actually took out all these things in my purse last Sunday when we went out. I felt sooo happy!

If you noticed, I have used two types of closures for this purse. One is a snap button and another one is a button and crochet fastener. I didn't intend to do it that way initially. But when I did it, I feel it looks great. Or am I being too obsessed with my creation? ;-)

Well, the button closes perfectly and doesn't let any of my cards or money slip out. The button and fastener keeps my cellphone in place and is easy to take out the phone quickly. You see, CONVENIENCE.

The button is from a jacket of mine. I just loved it when I put the button against the yarn. The flower embellishment took me just five minutes to make. And I really love it when the fastener is left open. It looks like the leaf of the flower. Don't believe? Scroll up and see again.

Let's move on!
Remember this fabric? Yes, I wanted to do a chair makeover with it. Our chairs looked like this or rather the seat cover was this.

Pretty huh? It was indeed but always looked dusty :-( So I have transformed it like this now.

Seems good? One more pic because I am totally in love with the makeover.

I really enjoyed this makeover. One time consuming part about this makeover was the sewing. Actually I don't have a gunstaple. So I had to sew in all sides of the fabric to the existing cover. Luckily my Mom's old thimble helped me a lot in the process. I have changed the table cloth also to the matching fabric and put on a transparent plastic table coat.


There is one more thing I want to show you. My new kitchen window curtain!
I loved the fabric the moment I saw it. When touched, it felt even better. It is kind of see-through fabric. So it does let the light into my kitchen but still blocks of the direct rays falling on to the fridge.
It took me just an hour or so to make it. And yes, I hand stitched it. I was so happy with the result that I made one more for the entrance to the kitchen. Unfortunately I didn't photograph it. The second curtain is a bit more bigger. Measures something around 85" x 38".
Did you notice the money plants on either sides of the window? These have been with me from the past two years. The small one had stopped growing. But now its showing signs of greens again :-) My brother asked me to throw it away when we were shifting. But I was so attached to these small lovelies. Now they are along with me here also :-)
Planning what to do next over this weekend. Happy weekend all! :-)

Monday, March 15, 2010

Sewing & Crocheting

I know, I have not been posting anything recently. That is just because I am not doing anything seriously for some time now :-) But as I mentioned in my previous post, I do have some WIP projects. And may be more than what I listed there. So you wanna know what all I have been doing?

Well, now I intend to tell you what each of these cluttered things or rather projects are. Hope I am not boring you!

This pile of yarn was presented to me by someone :-) I have already used up more than half of what I got. So its really less number of bundles in this picture. Guessing who gifted me this? None other than my husband :-) And you know what, he gave me these on the day of our marriage, after I reached his home. I was feeling all jitters and nervous being in the company of all unknown people and at a new place. Thats when he took me to our room and showed me a draw full of lovely, colourful yarn. I was so thrilled and happy! :-) That's my yarn story.

Now want to know what I used most of this yarn for? Well, its for this.


In my previous post, I did mention about a chair makeover. It is rather a stool makeover. I didn't take a picture of the stool but can tell you that it is in a pretty bad state. It is a sleek stool, an adorable red one. But recently the seat cover was spoiled. So I am working on this crocheted cover for this little stool.
See this now!

We went shopping last week and I bought this fabric. Wondering for what? Well, when we shifted to the new place we bought a small dining set. But the seat cover of the chairs get dusty soon as the fabric is sort of felt type. So I am planning to upholster our seats with covers of this fabric.

What I want to show you next is this.

Bought this fabric also from Commercial Street. I intend to make a curtain for my kitchen window out of this. The fridge is just by the window and the morning sunlight falls directly onto it. This fabric is extremely soft and light. This will cut off the direct rays yet allow lots of light in the kitchen.

Next is a project which I started working on before my marriage. But somehow did not find enough time to complete it and it got postponed.

It is a purse. I don't like carrying my bag around everytime I go out but still need important things like my cellphone, money, and Identity cards. So I thought that a small purse is a good idea. For this I am using the yarn leftover from my bag project. Does it seem very monotonous with that single color? Well, I intend to embellish it with something. Let me see what I can come up with.

And now stars!

This is another old project on hold. I want to make may be a table cloth or stole out of this. But keeping it aside for the time being.

And the last one is a stitching project.

It is a stitch cloth with a design of the Caspian Sea on it. I have to follow the colours and outlines as in the stitch kit and complete it. Wanna see a closer view of the stitches? Here it is!

Hope you all enjoyed my showcasing! :-)